

When renovating a home, flooring is vital in shaping the overall ambiance. Wood flooring offers a warm, natural aesthetic, but ensuring smooth transitions between different flooring types can be challenging. This is where wood flooring transition strips come into play, serving as essential elements in both function and design.
Transition strips provide a seamless shift between flooring materials, enhancing safety by eliminating tripping hazards and creating a polished, cohesive look. Whether bridging a gap between wood and tile or connecting wood floors of varying heights, these strips deliver a professional finish that ties your space together.
Choosing the right transition strip involves considering materials and colors that complement your decor. A well-matched strip not only enhances the aesthetic appeal but also protects flooring edges and ensures durability. These finishing touches elevate the overall look and functionality of your home.
In your renovation journey, don’t underestimate the importance of wood flooring transition strips. They are the subtle yet impactful details that complete your space with style and practicality.
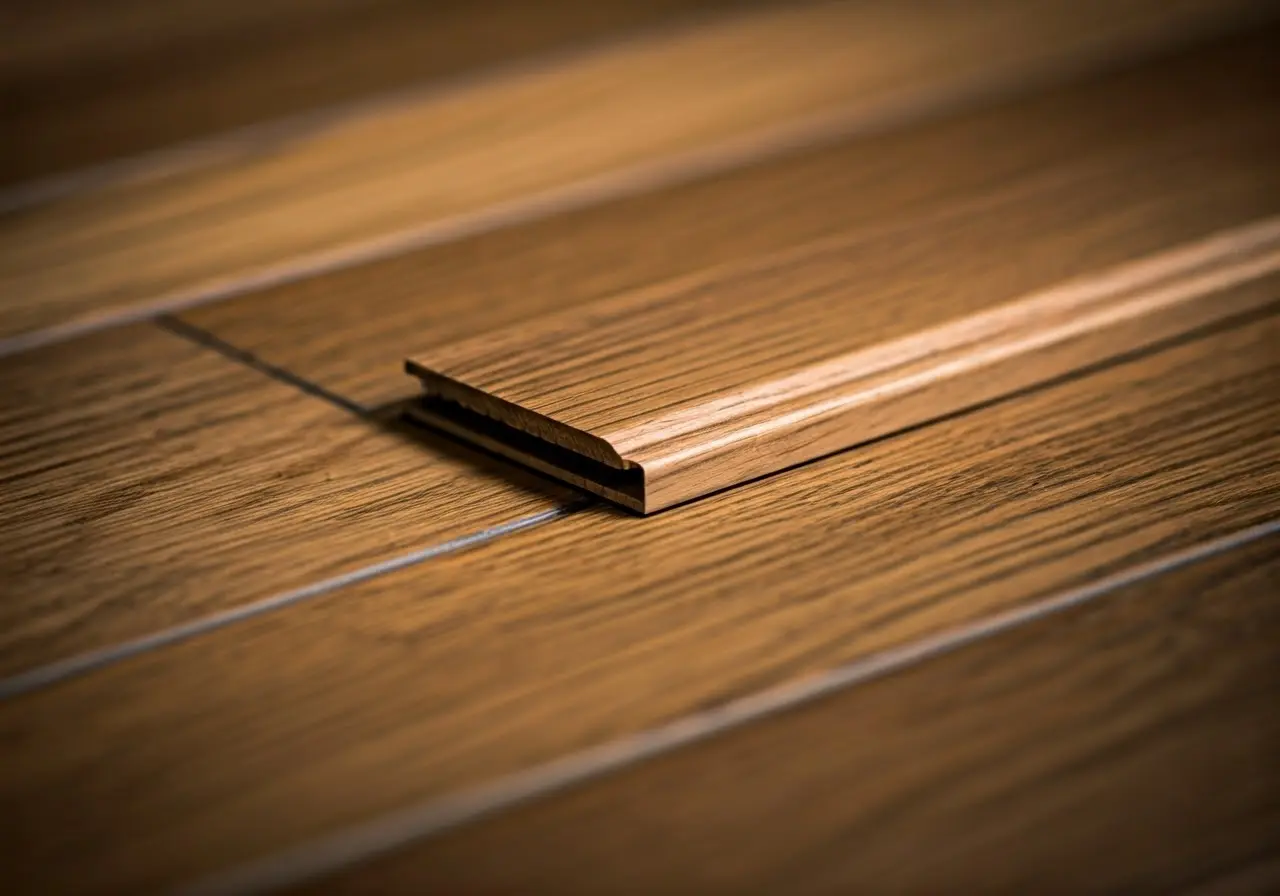
What Are Wood Flooring Transition Strips?
Transition strips are narrow strips of material that join two different flooring surfaces, ensuring a smooth changeover between them. These strips are particularly important when dealing with wood flooring, as they help to accommodate differences in height and texture.
The primary function of a wood flooring transition strip is to make the transition between two types of flooring visibly pleasing and structurally sound. For instance, when moving from a wooden floor to a carpet or tile surface, the strip ensures there is no awkward lip or bump. This not only prevents accidents but also protects the edges of each flooring type from wear and tear. By smoothing out height differences and providing a clean edge, transition strips can extend the life of your flooring. Properly installed, they reduce the potential for chipping or cracking at the edges, which can occur when there is a significant height difference.
Types of Transition Strips for Wood Flooring
There are several types of transition strips available, including T-molding, reducers, and baseboard transitions. Each type serves a unique purpose, depending on the flooring surfaces you are connecting. Understanding these differences is key to selecting the right option for your renovation.
T-molding is perhaps the most common type of transition strip used between floors of the same height, such as wood to wood or wood to tile of equal thickness. It rests in a channel cut between the two flooring types, creating an elegant link that prevents gaps and provides a visual flow. On the other hand, reducers are used when transitioning between floors of different heights. They gently slope from one surface to the next, which is ideal for a wood to laminate transition where the leveled surfaces are slightly off. Lastly, baseboard transitions are typically employed to tidy the gap between the wood flooring and the wall baseboard, ensuring a polished and finished look throughout the room.
The Practical Benefits of Using Transition Strips
Aside from their aesthetic appeal, transition strips offer practical benefits. They prevent tripping hazards by creating a smooth transition between surfaces and protect the edges of your wood flooring from damage.
In addition to providing safety features, transition strips also play a crucial role in maintaining the integrity of your flooring. When floors are installed in sections without adequate support at their seams, they are more prone to buckling or warping over time. Transition strips help to distribute weight evenly across the surface and minimize movement, which can lead to damage. By creating a smooth, supported transition, these strips extend the lifespan of your floors and ensure a more durable finish.
Moreover, using transition strips can also improve the energy efficiency of your home. Properly installed strips can seal the gap between floors, helping to keep indoor temperatures steady by minimizing drafts. This seal not only provides better insulation but can also contribute to reduced heating and cooling costs, making it a smart choice for eco-conscious homeowners looking for sustainability in their renovations.
Enhancing Home Aesthetics with Transition Strips
Transition strips serve more than a functional purpose—they can elevate the visual appeal of your home. Selecting the right material and color ensures they complement your decor, seamlessly connecting rooms and creating a unified design throughout your space.
Material choice is just as important as function. Options like wood, metal, or vinyl enable you to match or contrast with your flooring to achieve the desired aesthetic. For a seamless appearance in open-plan areas, a wood strip matching the flooring can blend spaces harmoniously. In contrast, metallic strips can enhance modern or industrial interiors, aligning with stainless steel accents.
Color selection is crucial for aesthetic consistency. Opting for neutral tones or hues that reflect other design elements, such as wall colors or furniture, ties the room together. A carefully chosen transition strip acts as a unifying detail, balancing diverse features and maintaining a cohesive and polished look throughout your home.
Installing Wood Flooring Transition Strips: A Step-by-Step Guide
Installing transition strips can seem challenging, but with proper guidance, it becomes a manageable DIY project. This step-by-step process will help you achieve a professional result.
Begin by measuring the gap between the two floor types with a tape measure. Record both the width and length needed for the strip. Cut the transition strip to fit these dimensions, ensuring the edges are smooth to prevent splinters or unevenness. Clean both floor edges thoroughly to remove debris, allowing the strip to adhere properly.
Depending on the type of strip, use either adhesive or screws for installation. For adhesive, evenly apply glue to the underside of the strip and press it firmly into place. For screws, drill small pilot holes into the strip and sub-floor for a secure fit. By following these steps, your transition strip will not only enhance the appearance of your flooring but also ensure long-lasting durability and functionality.
Wrapping It Up: The Indispensable Role of Transition Strips
In conclusion, wood flooring transition strips are indispensable tools in creating seamless transitions between different flooring types in your home. They not only enhance the aesthetic appeal but also contribute to the safety and longevity of your floors. By investing in these strips, you ensure a polished, professional finish to your renovation project, making your home both beautiful and functional. For more on flooring solutions and renovation tips, visit our homepage.

