

Refinishing hardwood floors is more than restoring their shine; it’s about rejuvenating your home’s appearance. This process can significantly enhance the aesthetic and atmosphere of your space. If you’re planning this project, understanding the timeline is essential for effective scheduling.
The condition of your floors is a key factor to consider. Heavily scratched or worn-out floors may require more time and effort to restore compared to those needing minor touch-ups. Additionally, the type of wood plays a role. Hardwoods like oak or maple may demand extra attention, especially if there are signs of discoloration or old finishes complicating the sanding process.
Begin by thoroughly assessing the condition of your hardwood floors—this foundational step is essential for success. If any challenging areas are difficult to evaluate, consulting a flooring expert can help prevent future complications.
Once you understand your floors’ state, prepare the space by removing all furniture and any old coverings. This process may take longer than expected, especially if the room contains numerous items. Ensure proper ventilation in your workspace to aid drying times later, and conduct a thorough cleaning to eliminate dust, which significantly impacts the final outcome.
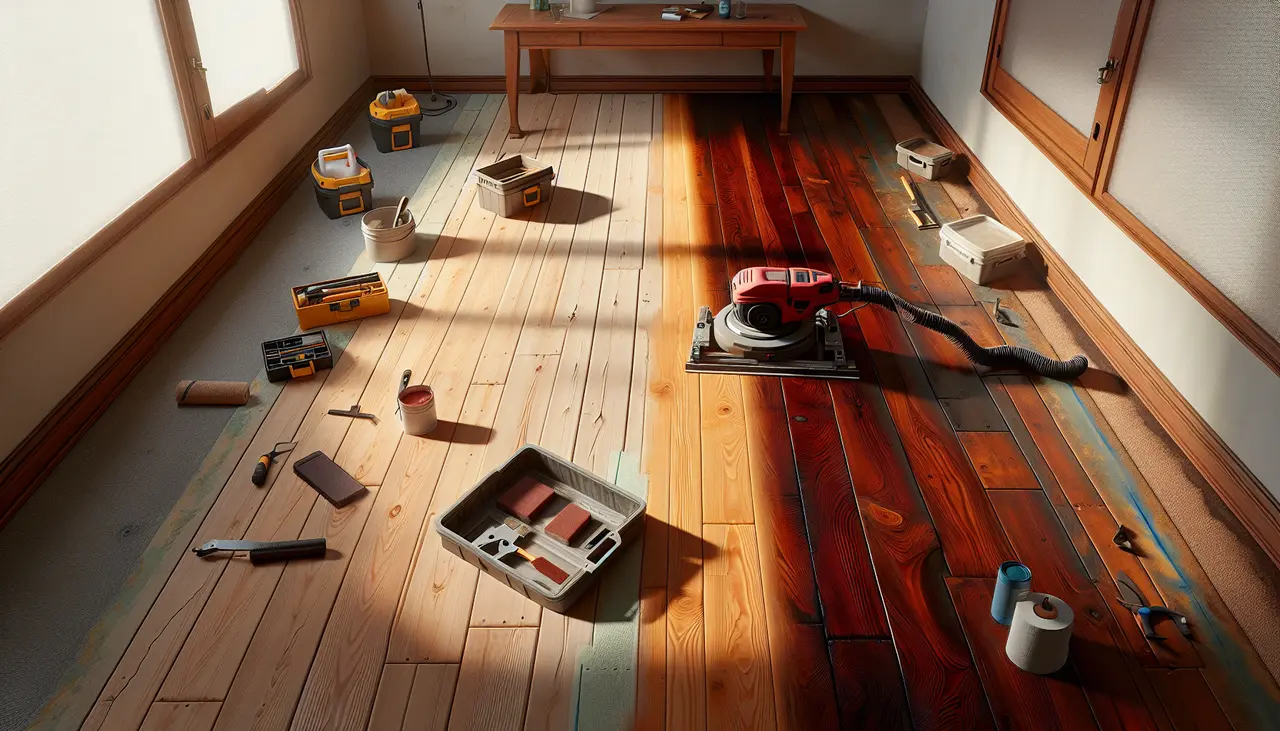
Sanding is the most labor-intensive phase of refinishing. Depending on the floor’s size and condition, this step could take several hours to a couple of days. The sanding process involves three critical stages: coarse, medium, and fine. Each stage is vital for achieving a smooth finish. If the task feels overwhelming, consider renting a sanding machine or hiring professionals who bring efficiency and expertise.
Finally, proceed to staining and finishing, where you can select the perfect color for your floors. Be patient during this step, as drying times vary with humidity and temperature. Adhering to the manufacturer’s recommended drying times will ensure the best results.
Evaluating the Current Condition of Your Floors
The first step in estimating the time it will take to refinish your hardwood floors is understanding their current condition. Floors that are deeply scratched or worn may require more extensive work compared to those with minor blemishes.
One must also consider the type of wood involved. Some species, like oak or maple, are harder and may need more care, influencing the overall time frame. If your floors have significant discoloration or water damage, this too could extend the duration of the refinishing process. In such cases, one might need to replace certain sections of the floor, which can add a few days to your project timeline. Examining nuances like these helps in setting realistic expectations right from the start.
In addition to physical imperfections, previous treatments such as sealants or paint can affect the project scope. Old layers of finish might need extra sanding, especially if they cover a large area, which can slow down the process significantly. Therefore, conducting a thorough inspection beforehand is crucial. Consider enlisting the help of a professional to evaluate the depth of work required, as their expertise can save you time and effort in the long run.
Preparing the Room for Refinishing
Preparation is essential to ensure a smooth refinishing process. This involves clearing the room of furniture, removing any existing floor coverings, and ensuring proper ventilation for your workspace.
Removing furniture often proves to be more time-consuming than anticipated. Consider renting storage solutions or using adjacent rooms to temporarily house your belongings. Alongside this, ensure you address ventilation; open windows and doors, and possibly use fans to facilitate air circulation to help with drying times. Adequate preparation not only ensures safety but expedites refinishing by allowing for unobstructed work areas.
Don’t overlook the importance of cleaning before you start. Dust and debris can interfere with sanding, staining, and finishing. It might seem insignificant, but vacuuming and sweeping thoroughly will ensure that the final finish is as smooth and as pristine as possible. Additionally, covering or removing hanging artwork and curtains can prevent unwanted dust accumulation during the sanding process, saving time on final clean-ups.
Sanding: The First Major Step
Sanding is often the most time-consuming step of refinishing hardwood floors. Depending on the size of your area and the amount of damage present, sanding can take anywhere from a few hours to a couple of days.
Sanding essentially involves three stages: coarse, medium, and fine sanding. Each step is designed to progressively smooth out the floor’s surface. A large space can overwhelm an individual, creating the need for rental machinery like drum sanders, which are more efficient for bigger jobs and can complete the task in less time. It’s also vital to wear protective gear to avoid dust inhalation and ensure personal safety throughout the process.
Choosing the right grit size for sanding paper based on the initial floor condition is paramount. Starting with a coarse grit will effectively remove old stain or sealant, while medium and fine grits can help achieve a smooth texture, preparing it for the next steps. Sanding should also be methodical starting from one corner and working your way out ensures a uniform finish.
For those short on time or facing particularly challenging conditions, outsourcing to a professional could be a viable solution. They often bring in advanced equipment that can expedite the process while ensuring quality workmanship. We offer expert floor sanding services that can perfectly cater to your needs.
Staining and Finishing the Floors
After sanding, staining and applying a finish coat are the next steps. Each of these requires drying time, which can vary based on the chosen products and the environmental conditions of your work area.
Staining involves selecting a color that best complements your home décor. It’s advisable to apply a sample before the main application to confirm its suitability. Allowing adequate drying time ensures the stain sets properly, preventing any layer intersections. Follow up with a durable finish that protects the wood from further wear and tear, enhancing longevity and aesthetics.
Temperature and humidity can significantly impact the drying process. In humid conditions, consider using dehumidifiers to speed up curing times. Conversely, in drier temperatures, open windows can increase ventilation. Be sure to check the recommended drying times on product packaging as it varies with different manufacturers.
Curing and Final Touches
Once the finish is applied, allowing enough time for the floors to cure is crucial. Depending on the type of finish, this could take anywhere from a couple of days to a week. During this time, it’s important to avoid heavy traffic and placing furniture back on the floor.
The curing process is what gives your hardwood floor the beautiful sheen while providing hard-wearing protection. Consider scheduling the refinishing project during a period when you can limit room usage. Explore alternative accommodations or plan a vacation, allowing the floor ample time to set without disturbances, leading to optimal results in terms of durability and appearance.
Final touches include returning the room to its original setup—carefully placing furniture back and adding rugs to protect high-traffic areas. Regularly maintain your newly refinished floors with gentle cleaning products to prevent scratches and wear. For further tips on maintaining your floor’s finish, take a look at our maintenance guide.
Wrapping Up the Refinishing Journey
Refinishing hardwood floors is a rewarding endeavor that can significantly enhance the appeal of your home. By understanding the process and timeline, you can effectively plan and manage the project, ensuring stunning results with minimal stress. Not only does this transformation bring a fresh look to your space, but it also increases the longevity of your floors, making it a smart investment in your home.
As you embark on this journey, don’t forget to lean into the details. Taking the time to evaluate your floors and prepare the area will make a world of difference. Each stage of refinishing brings opportunities for personalization—from choosing the right stain color to deciding on the finish that complements your lifestyle. Remember, preparation and patience are key. Each step, from sanding all the way to allowing for adequate curing time, plays a vital role in achieving that beautiful, long-lasting finish you desire.
It’s also a great excuse to treat your space to a little makeover! So, whether you’re planning an intimate living room update or a grand dining area revival, refinishing your hardwood floors can be that magical touch that ties it all together. Don’t rush the process; enjoy the transformation, and soon enough, you’ll be admiring your stunning, newly refinished hardwood floors that shine with a renewed brilliance, welcoming family and friends into your beautiful home.

