

Cutting wood flooring might seem daunting, but with the right tools and techniques, anyone can achieve professional results. This guide will walk you through the entire process, breaking down each step so you can confidently lay your wood flooring without a hitch.
One of the first things to remember is that preparation is key. Not only do you need to gather your tools and ready your workspace, but developing a clear plan for how you will cut the flooring is crucial as well. Picture this: you’re standing in your freshly cleared room, tools organized, and a solid plan in your mind. It’s a great feeling, isn’t it? That’s the confidence you want as you embark on this DIY adventure.
Measuring and marking are critical steps in any project, as they set the foundation for precision and success. Use a tape measure to take accurate measurements, ensuring every detail is correct. Clear and visible markings for cut lines are essential to achieving straight and precise cuts, so take your time and focus on accuracy.
When it comes to cutting, patience is key. Rushing can lead to errors, wasted materials, and unnecessary frustration. Approach each cut with care, staying focused and methodical. If issues arise, such as splintering or uneven cuts, pause to identify the cause. Check if the blade is suitable for the material and ensure the workspace is clean and organized. Addressing these factors not only resolves the immediate problem but also enhances the overall experience.
Embrace the process and enjoy the journey. Every step, from measuring to cutting, brings you closer to transforming your space. With each board laid, you’re building a project that reflects your effort and vision. Cutting wood flooring like a pro isn’t just about completing the task; it’s about creating a space you can be proud of, one careful cut at a time.
Understanding Your Wood Flooring Options
Before cutting wood flooring, it is essential to understand the type of material you are working with, as different flooring types require distinct cutting techniques. Solid hardwood, engineered wood, and laminate each have unique properties.
Solid hardwood, known for its durability and timeless beauty, is crafted from natural wood and can be sanded and refinished multiple times. However, its hardness demands precise cutting and the proper tools. Engineered wood flooring, with its layered construction of a real wood veneer over plywood or high-density fiberboard (HDF), offers dimensional stability and resistance to warping in humidity. Its structure requires a tailored approach for effective cutting. Laminate flooring, a synthetic product featuring a photo-realistic wood image beneath a protective layer, is valued for its affordability and ease of installation. However, its tendency to chip makes careful cutting techniques essential. Understanding these characteristics will help ensure efficient cutting while minimizing waste and effort.
Gathering the Essential Tools
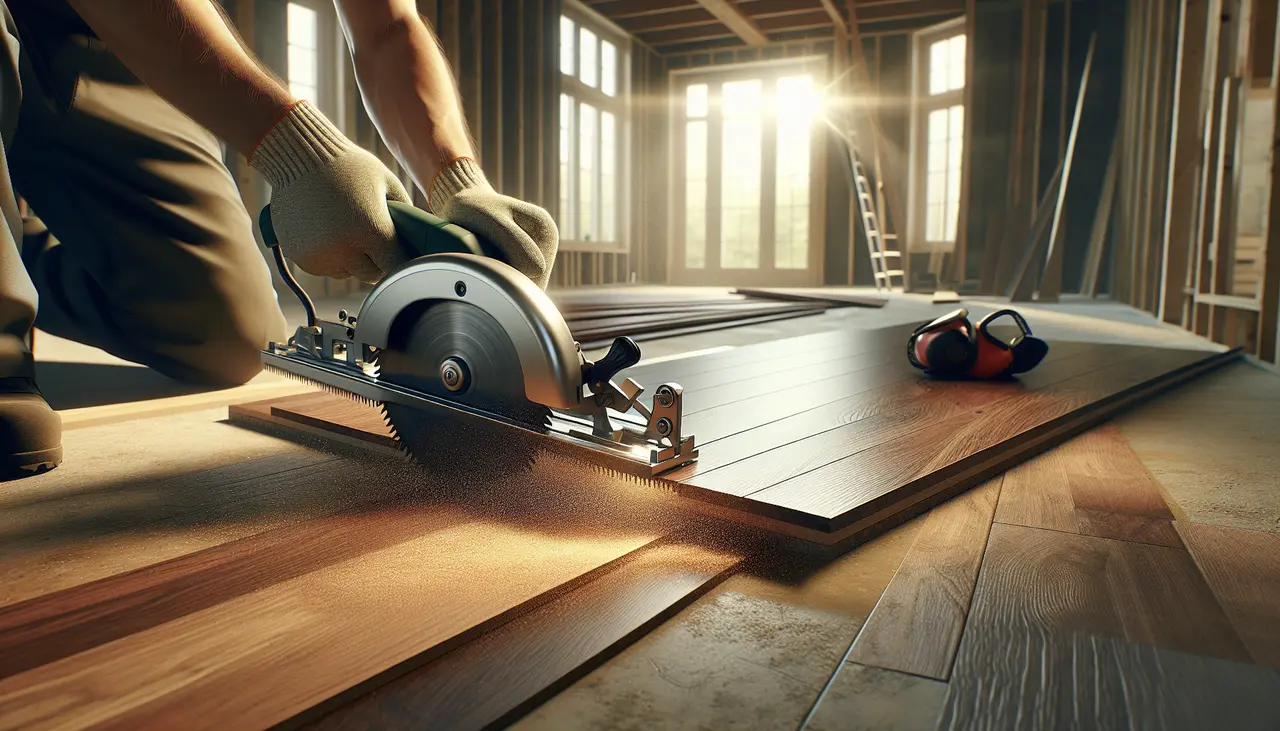
Having the right tools at your disposal will make the cutting process smoother and more precise. Some key tools include a circular saw, jigsaw, tape measure, and a carpenter’s square.
Additionally, considering investing in a miter saw for crosscutting and a table saw for longer rip cuts. These tools increase precision and efficiency, especially for larger projects. Equipping yourself with sharp, quality blades is crucial as they ensure cleaner cuts and minimize splintering and chipping, especially important when working with laminate or engineered wood flooring. Protective gear such as safety goggles, ear protection, and dust masks shouldn’t be overlooked; they ensure your health and safety throughout the project. Organizing your tools beforehand will not only save time but also create a more efficient workflow. For comprehensive advice and a checklist of must-have items, check out our tool collection guide.
Proper tool maintenance is essential for ensuring their longevity and optimal performance during flooring projects. Clean and well-maintained tools not only last longer but also function more effectively. For new homeowners or DIY enthusiasts lacking a complete set of tools, renting from local hardware stores or borrowing from friends or family can be a cost-effective solution while still accessing quality equipment. Reliable tools are crucial to support, not hinder, the success of your project.
Safety First: Preparing Your Workspace
Creating a safe and organized workspace is crucial. Ensure you have adequate lighting, wear protective gear, and have a clean area to prevent accidents.
Start by removing debris and clutter to eliminate tripping hazards. Ensure the workspace is well-lit, using both overhead and task lighting for clear visibility and precision. Arrange tools and materials within reach to minimize unnecessary movements that could lead to fatigue or errors. Designate separate areas for cutting and assembling to enhance safety and workflow efficiency. Wear appropriate safety gear, including gloves and steel-toed boots, to protect against injuries from dropped tools or materials.
Good ventilation is crucial for a comfortable environment and to prevent dust accumulation, which poses health and safety risks. Use a dust extractor or shop vacuum to maintain cleanliness and visibility by capturing sawdust at its source. Establish a marked safety zone for authorized personnel only, and reduce distractions like mobile phones or excessive noise. Maintaining sharp focus throughout the flooring installation process is essential for ensuring a safe and effective outcome.
Measuring and Marking Your Flooring
Accurate measurements are key to a successful flooring project. Learn how to measure and mark your flooring properly to avoid errors that could lead to wasted material.
Begin by using a reliable tape measure to get exact measurements of the room, simplifying them by breaking the area into manageable sections if needed. Calculating flooring layout is essential to avoid narrow strips at walls, which can affect the floor’s aesthetics and stability. Once sizes are noted, use a quality carpenter’s pencil to mark cutting lines clearly and accurately, ensuring you follow markings closely when you cut. Working with a carpenter’s square is particularly beneficial for ensuring lines are perfectly straight, reducing errors. Always double-check your calculations and markings; the classic ‘measure twice, cut once’ approach cannot be overstated. Anticipate potential issues by accounting for your flooring’s expansion gaps—essential in maintaining the floor’s durability over time.
Consider using a chalk line for longer cuts. This tool gives you a perfectly straight reference line on your cutting board and can be especially helpful when dealing with large pieces of wood. If your room includes tight corners or odd shapes, a contour gauge will assist in accurately replicating the shape of unusual layouts. This way, you maintain consistency throughout the project. Remember, taking the time now to ensure all measurements and markings are accurate will streamline your installation process and minimize mistakes.
Cutting Tips for Different Flooring Types
Each type of wood flooring may need specific cutting techniques. Discover tips for cutting hardwood, engineered, and laminate flooring efficiently and cleanly.
For solid hardwood, it’s imperative to use a sharp carbide blade, which can easily handle the dense material without causing tearing or burning. Engineered wood, although similar on the exterior, requires a keen eye on the veneer layer to prevent chipping. Using painter’s tape along cut lines can help minimize splintering. Consider utilizing a jigsaw for curves or irregular cuts, as this tool allows for greater agility when maneuvering around awkward angles or patterns. Laminate floors, being more prone to chipping, benefit greatly from reverse tooth blades in saws, which cut on the downstroke, reducing surface splintering.
Always maintain cutting stability by securely clamping down the material while working. For less experienced DIYers, practice on scrap material first to get a feel for the tool and material behavior. Continuously inspect and adjust your tools, ensuring no loose screws or dull blades, which will maintain tool performance and safety. Knowledge of these diverse techniques will ensure that your work is not only precise but also visually appealing, regardless of the flooring type.
When dealing with intricate cuts, like around doorways or vents, employing a handsaw or oscillating tool can offer the precision required for clean finishes. Maintaining patience throughout the process is key; rushing often leads to mistakes that are more time-consuming in the long run. With each technique tailored to the specifics of the material, you’ll be able to handle any flooring scenario with confidence.
Troubleshooting Common Cutting Issues
Even with the best preparation, issues can arise. Learn how to troubleshoot common cutting problems so you can maintain your project’s momentum.
One frequent issue is splintering or chipping, most common when using dull blades or incorrect cutting techniques. Ensure your tools are up-to-date and use cutting methods appropriate for the material at hand. If boards are misaligned during cuts, check your markings and measure again for accuracy, ensuring all boards are snugly fitted and aligned within their spacers pre-cut. For uneven cuts, consider adjusting your saw’s settings and test cuts on scrap pieces before tackling your actual project pieces. Don’t hesitate to consult online resources or professional advice when facing persistent problems—these can offer innovative solutions and prevent future headaches.
If particular cutting errors continue, investigate potential issues with your underlying surface. An uneven subfloor will often translate into uneven flooring when installed. Address these problems sequentially: correct the subfloor, then proceed with your flooring project. Lastly, take care to keep your workspace clean and check for any inadvertent obstructions underneath the boards. Keeping these aspects in check ensures smooth cutting, saves valuable materials, and ultimately, results in a flawless flooring finish.
Wrapping Up Your Flooring Project
With the right planning, tools, and techniques, cutting wood flooring can be an enjoyable and rewarding project. It’s all about setting yourself up for success! Remember, the journey doesn’t just end with the final cut. It’s a process filled with creative moments where you get to see your vision come to life. Take pride in each step, from measuring to cutting, and even troubleshooting along the way.
As you gain experience, you’ll feel more confident and capable, and you might even discover some personal tips and tricks that suit your style. Embrace any challenges, and don’t be afraid to ask for help or seek advice if you encounter roadblocks. This project is not just about laying down planks; it’s about crafting a space you’ll love and enjoy for years to come.
So, whether you’re a seasoned DIY enthusiast or a first-timer, remember that with the right guidance, you can absolutely nail this! Before you know it, you’ll be standing on a beautiful floor that you’ve created all by yourself. For further support or to explore more flooring options, visit our homepage. Happy flooring!

